Creating a Forecasting Project
- From the SAS
Model Studio
Projects page, click New
project. The New Project
window is displayed.
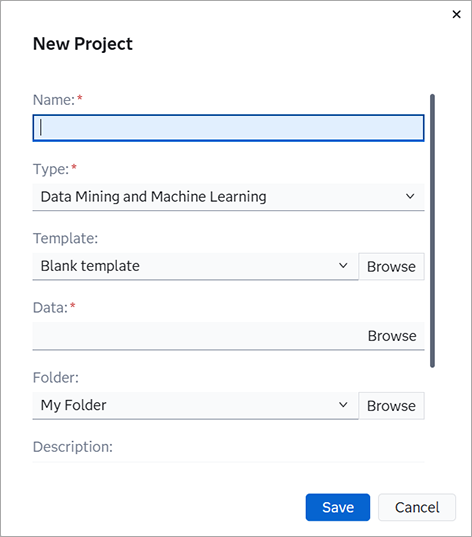
- For Name, give the project a unique name.
- For Type,
select
Forecasting. - For Template, the template that you choose determines the initial pipeline for the project. For
projects using time seriesan aggregation of transactional data into specified time intervals and sorted according
to unique combinations of the default attributes (BY variables) data source, the Auto-forecasting template is sufficient for a quick start. See Pipeline Templates Provided by SAS Visual Forecasting before you
select any other template for your project. Some
of the templates are not suitable for use when creating a new project.
If your data source is output data from another forecasting project, the only valid template is External Forecasts. If any other template is chosen, the project is automatically created using the External Forecasts template. For more information about external forecasts and projects based on output data, see Working with External Forecast Projects.
- For Data Source, click
Browse. The Choose
Data window is displayed.
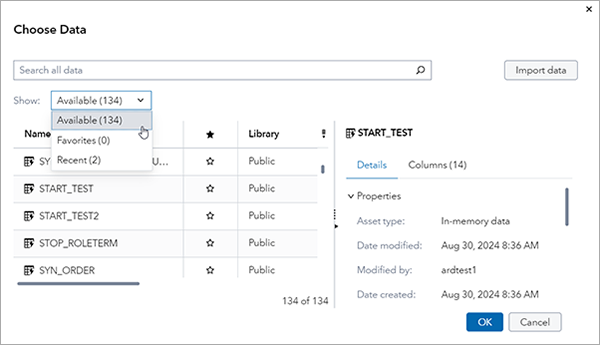
A list of data sets is displayed on the left side. These are data sets that are available in CAS and ready for use in a SAS Model Studio project. If your source data set is not listed, you might need to change the Show field to Available. This loads all of the data sources into the list.
- Select a data set. The details are displayed to the
right. Click the Columns tab on the right to
see the variables in the data set.
Note: If you have any data sets in SAS7BDAT or SASHDAT format, you can right-click the data set and select Load. The data is loaded into CAS memory and is ready to be used in a project.
If the data source is an Azure Data Lake Storage (ADLS) caslib, a message that instructs you to authenticate the connection might appear. In that case, follow the instructions provided in the message.
If you have a local file with a valid time variable, follow these steps to upload the file to use in a project.
- Click Import data. This opens the Import Data window.
- Click Local Files to select a file to upload.
- Click Import item to import the data set.
- Click Add to add the data set and return to the Choose Data window.
- Scroll through the list of data sets to select your imported data.
For more information about how to use this window to access data, see Getting Started with the Choose Data Window in SAS Data Explorer: User’s Guide.
- Click OK to load the selected data set and return to the New Project window.
- For
Location, the folder that was most
recently selected is shown, or My Folder is
shown if a folder has never been selected. The drop-down list includes
My Folder and up to five of the most
recently selected folders, if any folders have been recently
selected.
You have two options.
- Choose the current selection or one of the drop-down options for storing the project.
- Click
Browse. The
Choose a Location window
opens for you to choose a different folder to store the
project in.
To create a new folder, select
My Folderon the left and then click in the upper right corner.
 Select the folder to store the project in and click OK to return to the New Project window.
Note: Many of the folders listed on the left side of the Choose a Location window can be selected but should be avoided. Selecting these folders makes the project visible to other users but does not grant access to all resources used within the project to the other users. This can unintentionally make the project available for other users. It can also lead to errors encountered when other users open and attempt to edit your project. For best results, use eitherMy Folderor a folder that you or your system administrator has created for your use.
- Click Save.
The new project that you created is opened with the Data tab selected. Your next steps are to assign the time and dependent variables for your project.