Creating Segmented Pipelines
Follow these steps to create a pipeline for segmented data. To use the External Segmentation pipeline, the attributes must already be imported with defined segments. See Defining Project Segments for more information.
- From the Pipelines tab,
click
 to create a new pipeline.
This opens the New Pipeline window.
- For Name, enter a meaningful name or accept the default.
- Click the drop-down menu for Template and select Browse templates.
- In the template list, select the type of segmentation template to use. Choose either External Segmentation or Demand Classification and click OK.
- Click Save on the New Pipeline window.
The segmented pipeline is added to the Pipelines tab.
|
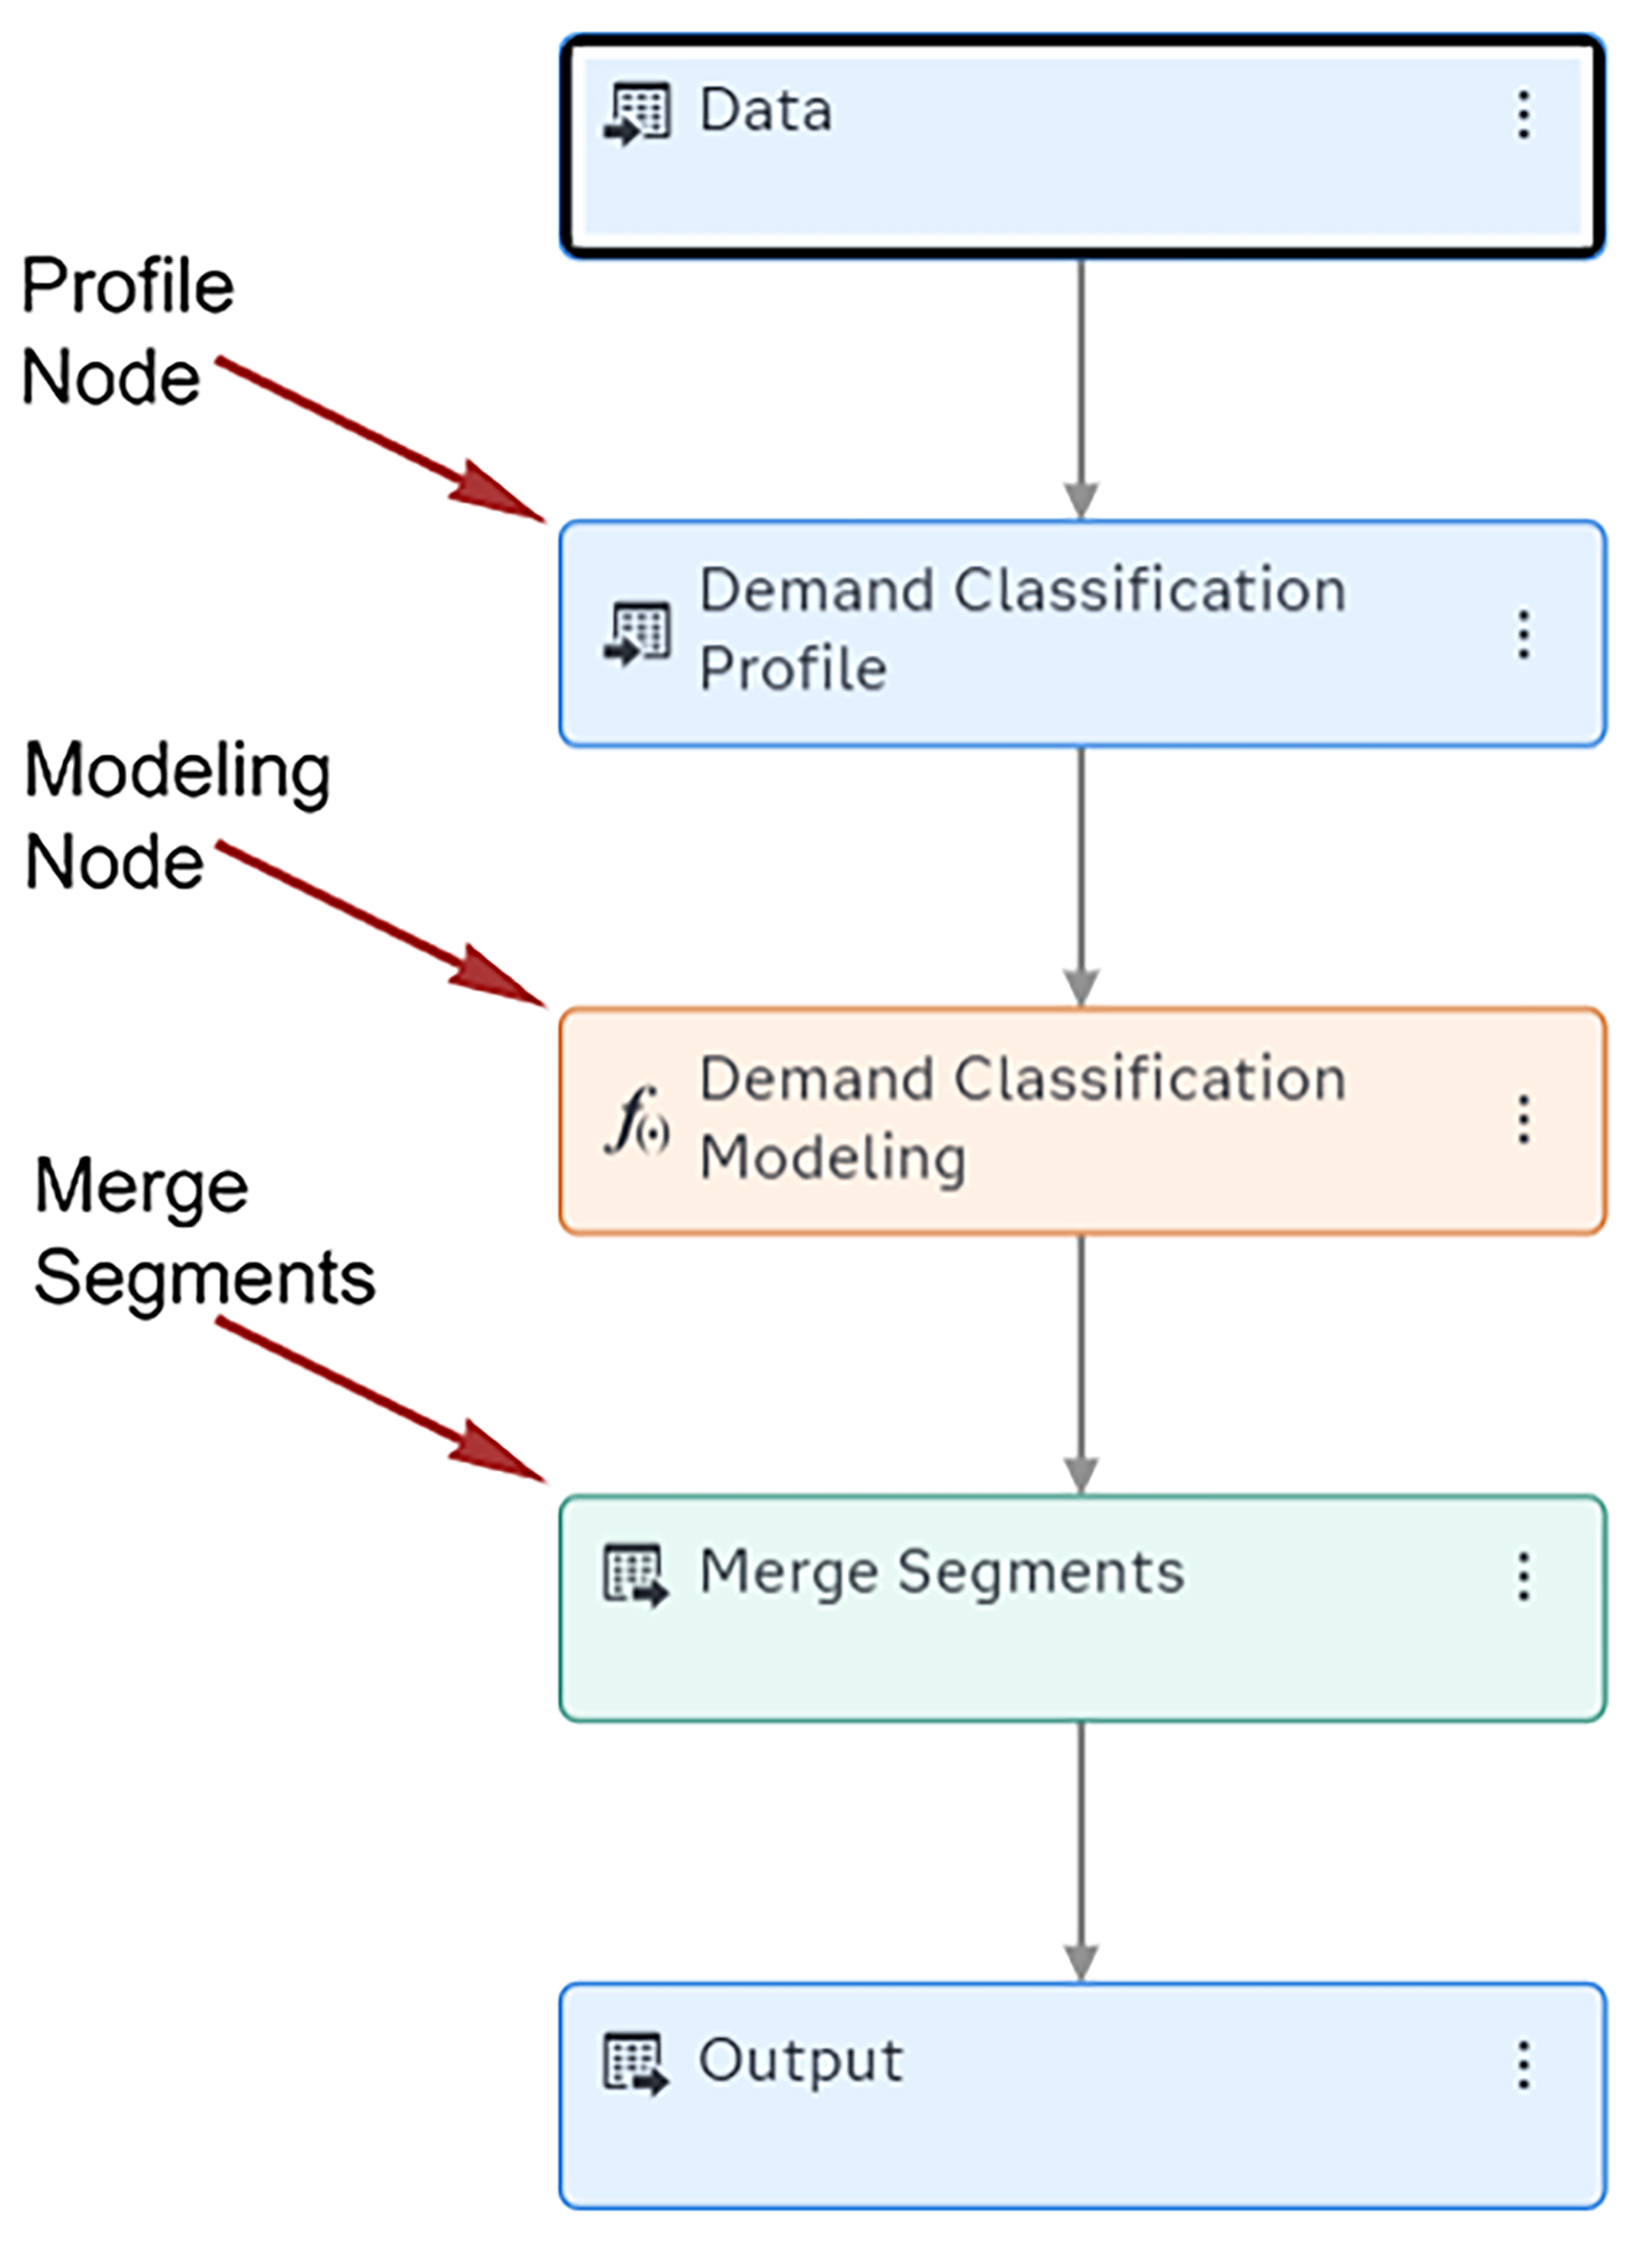
Examine the structure of the segmented pipeline. Instead of modeling nodes and Model Comparison, segmented pipelines have the following nodes.
Segmented pipelines cannot be modified by adding or removing nodes. You can open these nodes to customize the segments. Each segment has its own nested pipeline. For more information, see Customizing Each Segment. |
|